

Welcome to Forging Basics, your guide to mastering blacksmithing for beginners.
Our forge is dedicated to teaching the fundamentals of blacksmithing, from essential blacksmithing tools and techniques to the traditional art of forging.
Whether you’re curious about how to start blacksmithing or want to explore step-by-step projects, we’re here to help you build a strong foundation in this timeless craft.
16 Blacksmithing Techniques.
This guide covers the fundamental skills and basic blacksmithing techniques that you will use to forge steel. Before you start, educate yourself with these 16 essential blacksmithing techniques used to forge beginner to advanced projects in the smithy.
5 forging techniques in blacksmithing.
The following forging techniques are essential to any smithy. Depending on the project, you will likely use each of these basic blacksmithing techniques in each forging session.
Bending
To make a bend or curve in the metal, heat it and hold it over the anvil horn and strike it with a hammer to make your desired curve. You can strategically heat sections of your metal in the forge before bending it, rather than heating your entire piece. You can also unbend metals by reheating the metal and reversing your steps.
Punching
Punching utilizes a punching tool to make holes in hot metal. Begin by heating the metal, identify where you want to punch a hole and hammer your punching tool softly on the intended spot until you feel resistance from the anvil. Be careful not to hit too hard, so you do not damage the surface of your anvil.

Drawing
Drawing is an essential technique in blacksmithing and is used to make your metal longer and thinner. You will want to use your tongs to hold down your piece on the anvil and hammer both sides to extend the length.
Upsetting
Upsetting is the opposite of drawing, and is used to make your metal thicker, shorter, and narrower. This requires a little more technical skill than many forging techniques. The process can be difficult to control and is used in more advanced stages of blacksmithing. You can heat the specific part of the metal in the forge that you intend to shape, rather than heating the entire piece in the forge.
Shrinking
Shrinking is the process of compressing metal between the flat head of your hammer and the flat surface of the anvil. This method works best when the width of the anvil and flat head of the hammer are the same width as the object.

3 heat treatment techniques in blacksmithing.
Throughout forging, blacksmiths use heat treatment techniques to strengthen material and make it easier to work with. Annealing, hardening, and tempering are three essential heat treatment techniques used in blacksmithing.
Annealing
Annealing makes the material being forged easier to work with. It softens the metal, causing it to bend and shape more easily. Annealing also protects material from cracking or snapping. To anneal material, you will bring it up to heat in the forge and cool it down very slowly by placing it in sand or vermiculite. This is especially important when working with recycled materials. Annealing removes impurities in the grain, increases the material’s strength, and reduces its hardness.
Hardening
Hardening is the process of controlled heating and controlled cooling of the material in order to increase its strength. The metal is brought up to its highest temperature and is rapidly cooled by quenching it in a liquid—commonly water, salt water, or oil. Water is the fastest quenching material, while oil and salt may be added to slow down the cooling process. This would prevent the materials from becoming brittle.
Tempering
After hardening, the forged metal is tempered to increase the toughness and reduce excess hardness. To temper, the metal is heated and cooled at room temperature to decrease the brittleness and increase strength.

8 miscellaneous blacksmithing techniques everyone should know.
These blacksmithing techniques are centered around four main stages of the forging process: heating, holding, hitting, and shaping. From cutting into metal to joining it together, you can create limitless forged projects using these blacksmithing techniques.
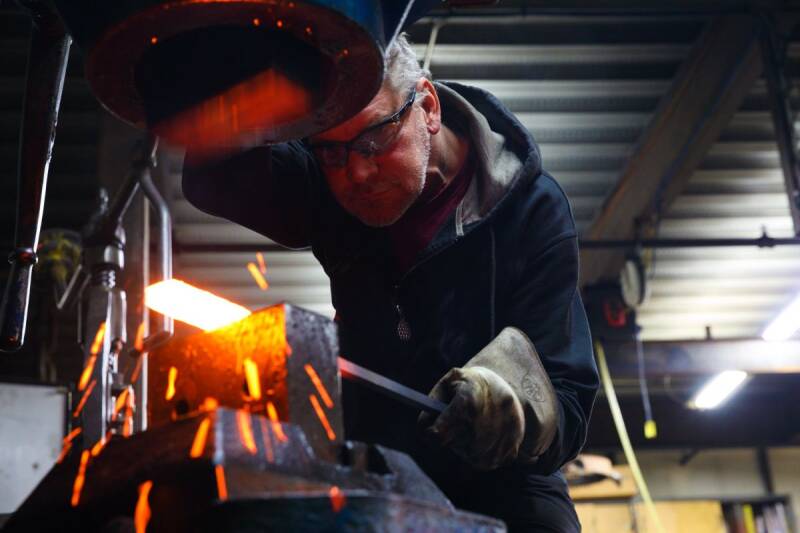
Hitting
The forging process requires striking metal with a hammer against an anvil accurately with the appropriate force and in the right locations. DIfferent techniques call for different force and hitting patterns. It may be a series of hard blows, soft taps, or a combination of the two depending on the process at hand.
Quenching
Quenching is the process of placing heated metal directly into a liquid to rapidly cool the piece and ultimately strengthen the material. The liquid may be water, salt water, or oil-based. It can be used to isolate one side of a piece in order to only work the opposite side. It is also used to make metal harder by reducing brittleness and internal stresses. It is best to submerge the hot material straight into the liquid to prevent distortion.
Cutting
In order to cut metal, strike a hot cut chisel into material that has been heated up to a bright yellow color in the forge. As you cut the steel, the chisel tip will also heat up, so remember to regularly quench the chisel in water to cool it off. In order to protect the surface of your anvil, use a sacrificial piece of scrap metal between your material and anvil. Soft metals like aluminum are ideal sacrificial pieces in order to keep your chisel sharp.
Shaping
Hot metal can be shaped using bending, drawing, and upsetting techniques. First, heat the metal in the forge until it is easily malleable. Then, strike the hot metal with a hammer against the anvil to shape it.

Tapering
To forge a taper, heat the material on one end and position it on the edge of the anvil. Use the drawing technique to strike the hot edge, rotating it 180 degrees each strike, and then 90 degrees each strike to narrow the edge to a tapered point.
Flattening
Flattening reduces the thickness of a piece of metal through heating and striking. It is typically used as a finishing technique to make a surface flat and smooth.
Dishing
Dishing is a forming technique used to shape flat sheet metal into curved shapes by hammering into a concave indentation, similar to a mold. Blacksmiths use a dishing stump as a form to hammer into. A dishing stump is a large wooden block, often built from a tree trunk, that has a circle carved into it, where the sheet metal is placed and hammered into.
Collaring
Collaring is a joining technique that is accomplished by wrapping a piece of metal around the pieces of material that will be joined. The blacksmith strategically heats the two pieces of metal to be joined and hammers them together in one area, creating small “O” shapes. This technique is used in forge welding.
Metalworking 101: The Basics of Metalworking
What is metalworking?
Metalworking is the process of forming and shaping metals to create useful tools, objects, equipment parts, and structures. Metalworking projects generally fall under the categories of forming, cutting, and joining, and may involve techniques such as cutting, welding, casting, and molding. Materials used for metalworking include ferrous and non-ferrous metals such as steel, aluminum, gold, silver, bronze, iron, and more.
The history of metalworking
For thousands of years, precious metals have been worked into objects and valued by ancient civilizations, from Pharaohs in Egypt to Mayans in North America. The oldest known evidence of metalworking is a copper pendant uncovered in Iraq and dates back to 8,700 BCE.
Metalworking has been a way for civilizations to communicate status, religious beliefs, and symbolism through artifacts and a practical way to build tools and structures. It has been practiced by artisans, blacksmiths, alchemists, contractors, and more around the world, all of whom specialize in different aspects of metalworking. Many ancient metalsmithing techniques are still used today, from soldering to welding.
Metallic ores have been extracted from the earth for thousands of years, placing great importance on metalworkers as the source of extricating metals. For example, you can remove iron from mineral-rich sand and mine precious metals like silver from the earth. In modern times, metals have become even more critical to humanity and advancements in technology and transportation. Metalworking is all around us, from the fabrication of electronics to automobiles.

Metalworking techniques
Metalworking techniques create everything from small decorative objects to large-scale structures. While many metalworking techniques will be similar across different materials, the properties of the metal you are working with will greatly impact your work and your desired finished result.
Cutting
Cutting removes material from metal using milling, routing, turning, and technologies like CNC (computer numerical control) machines. Plasma cutters are gas-powered torches powered by argon and hydrogen gas that will remove material and make holes in metal. Cutting is often used in metalworking fabrication shops, automotive repair, and construction.
Joining
Joining is the process of combining several pieces of metal with heat through welding or soldering. Welding is a fabrication process that utilizes a welding machine to join ferrous and non-ferrous metals and works well for larger projects. Soldering is a joining process used to fuse different types of precious metals together by melting solder and works well for small projects. New technology continues to develop as metalworking advances.
Forming
Forming is the process of re-shaping and fabricating metal objects without adding or removing any material. This process is possible through a combination of heat and pressure. Both forging and bending are essential methods for forming metal. When forging metal, you will heat it in the forge, then hammer and bend it into your desired shape. To make a bend or curve in the metal, heat it in the forge, then hold it over the anvil horn and strike it with a hammer to make your desired curve. The English wheel is a tool that allows metalworkers to easily form and shape cold materials, such as aluminum or steel.
Casting
Metal casting is a metalworking process that can be traced back to around 4000 BCE, and it is still used for making sculptures, tools, and jewelry. Metalsmiths have been pouring molten metals into cavities shaped in stone, plaster, sand, and even bone since we learned to melt metals. Metal casting is cost and time effective, and it gives you the ability to make multiples of the same piece.
The common methods for casting metal are lost wax casting and sand casting. Lost wax casting involves carving or shaping your piece in wax, creating a plaster mold around it, then burning out the wax. Sand casting uses sand as the mold material. Sand is combined with a bonding agent, such as clay, and is gated. Then, molten metal is flowed into the mold to create a solid object.

Cutting processes & techniques
Metals must be cut and separated throughout the metalworking process to build structures, make tools, and more. There are numerous metal cutting methods available for metalworking, from using simple handheld tools to a variety of more advanced machines and equipment.
Milling
Milling is the process of removing precise amounts of material from a greater piece. A milling machine rotates a cutting tool and brings the cutting tool into contact with a workpiece. The mill and lathe are the cornerstones of any machine shop and can produce pieces with great precision, repeatability, and accuracy.
Turning
Turning is a machining process in which a cutting tool moves linearly while the workpiece rotates, strategically removing material from the piece. Material can be removed from both the depth and width of the workpiece. Lathes are traditionally used in turning as the leading principal machine tool. As technology has advanced, CNC machines are also used for a more automated process.
Grinding
Grinding uses an abrasive process to remove material from the workpiece, typically in the finishing stages of metalworking. Grinding machines range from hand-held angle grinders to bench grinders, to more advanced CNC machines. These machines can range vastly in size and precision. Grinding creates very fine finishes and precise cuts using an abrasive wheel made from stone, diamonds, or inorganic material.
Drilling
Drilling creates holes in metal using a drill press, handheld drill, or CNC machine. Make sure you lubricate your bits with cutting fluid to prolong the tool’s life and prevent overheating. This ensures a smooth and accurate hole and also prevents chattering or unsafe drilling.

Joining processes & techniques
Joining metals utilized heat and pressure in order to create a larger piece or build a structure. Welding and riveting are excellent joining techniques for larger projects that bear weight, while soldering is a process for joining smaller materials, like jewelry and sculptural objects.
Welding
Welding metal is a fabrication process that joins materials through pressure and heat. Different types of welding work indoors, while others are best applied outdoors. Welding is used to forge swords, build ships, fabricate structures, and more. There are many kinds of welding to choose from, each with specific practical applications. Learn about the different types of welding in this guide.
Soldering
Soldering is another method for joining metals by melting a filler metal on top of the metals being joined to make a reliable electrical bridge. A low-temperature alloy is melted into the joint, fusing the metals into one solid piece. Metalworkers use either an eclectic soldering iron or a gas-powered torch to join precious metals. Soldering is commonly used in plumbing, electronics, and metalwork to fabricate and musical instruments.
Riveting
Rivets are permanent mechanical fasteners that can create kinetic joints in a workpiece or reinforce the structural integrity of a larger object. They are ideal for joining pieces that are lightweight and require high strength. Before welding was used to build framed buildings and structures such as the Eiffel Tower and Sydney Harbour Bridge, rivets were used at the joints to join the metal. Before they are installed, rivets are smooth metallic cylinders with a head on one end.
Forming processes & techniques
Reshaping and manipulating the shape of metal can be done when the material is hot or cold. The type of forming process you choose will depend on the metal you are forming, the equipment you have available, and your desired final outcome.
Forging
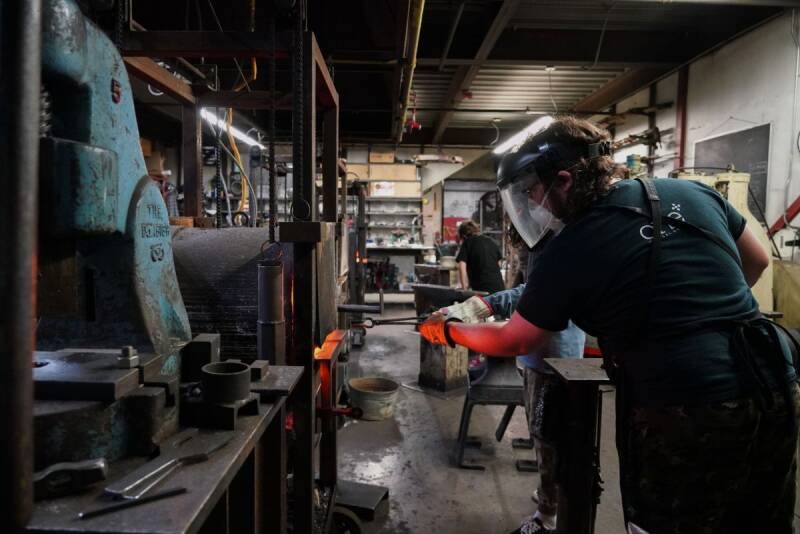
Forging is one of the oldest metalworking processes used to form and shape metal. The metal is heated in the forge, then hammered and bent into the desired shape. The blacksmith may choose to use a hammer to forge smaller objects or an industrial power hammer for larger projects. Forged metals are incredibly strong, and are typically made of iron and steel.
Roll forming
Roll forming is a process that involves the continuous bending of a long strip of sheet metal through a roll forming mill at room temperature. Unlike other metal bending methods, the roll forming process is inherently flexible, precise, and can form metals up to a quarter of an inch thick. Students practice roll forming in our Sheet Metal Forming class with the master artist Evan Wilcox.
Rolling
Rolling is a metal forming process in which metal stock is passed through a rolling mill to reduce the thickness or to make the thickness uniform. It can be done hot or cold. Hot rolling is typically used to produce sheet metal and larger workpieces. Cold rolling works well for smaller objects, and increases the material’s strength and improves the surface finish, requiring less finishing work.

Casting processes & techniques
In the metal casting process, solid metal objects are formed by pouring molten metal into a mold, where it is cooled and extracted from the mold. Metal casting is cost and time effective. Common methods for casting metal are investment or lost wax casting, die casting, and sand casting.
Investment or lost wax casting
Investment casting is a process in which a molten metal is poured into a mold that has been created from a wax model. Was sprues are attached to the mode and a plaster mold is shaped around the wax. The mold and wax are placed in a kiln to burn out the wax. Then, metal is melted and flowed into the plaster mold using a vacuum or centrifugal caster.
Die casting
Die casting is an automated and fast process that forces molten metal into a mold under high pressure. The mold is made from two machined steel dies, and metal is directly injected into the mold at a high speed. Most die castings used alloys with a low melting point, like zinc, copper, aluminium, and magnesium.
Sand casting
Commonly used in foundries, sand casting uses sand as the mold material. The mold is created by combining sand with a bonding agent, such as clay, and is gated. Molten metal is flowed into the mold to create a solid object. Sand casting is the most common metal casting method, and is relatively inexpensive.
How to learn metalworking
Throughout this guide, we have covered about twenty different metalworking techniques! From casting to welding, there are many possibilities when you are starting to work with metal. Most metalworking requires advanced equipment that you should learn how to use from an experienced professional. While it is possible to learn from methods at home, we always recommend starting with a class to learn safely and set yourself up for success.
Learn metalworking at The Crucible
The Crucible offers metalworking classes in blacksmithing, foundry, jewelry making, machining, and welding. Taking a metalworking class at The Crucible ensures safety under the guidance of a skilled instructor, and is more cost-effective than purchasing all of the necessary equipment. And, most classes are beginner-friendly with no prior experience necessary!

Metalworking FAQs
What tools do you need for metalworking?
Different metalworking processes will require various tools and equipment. Projects might include molding, drilling, casting, welding, cutting, and more. Common tools you may use for metalworking are a bandsaw, hacksaw, welder, angle grinder, belt sander, and drill press. Make sure you fully understand how to use the equipment safely before you begin.
Is it hard to learn metalworking?
How quickly you learn metalworking will depend on the type of metalwork you are interested in, your available resources, the projects you want to create, and more. Metalworking generally takes practice and patience to grasp. There are many factors to learn, from casting temperatures of different alloys to the different types of welding. It takes variable amounts of time to learn the many types of metalworking equipment and machines, from turning on a lathe to joining metals with a welding machine.
What jobs can a metalworker do?
Metalworking is a profession that goes back centuries and spans many different careers. Metalworking jobs include being a welder, blacksmith, silversmith, goldsmith, founder, jeweler, machinist, and more.
Do metalworkers make good money?
A metalworker’s salary depends on the type of work they do, their experience, and where they live and work. According to the U.S. Bureau of Labor Statistics, a sheet metal worker makes an annual average of $50,400, a jeweler makes a median salary of $46,702, industrial ironworkers make about $53,650 per year, and welders earn about $42,490 annually. There are many factors and niche markets within each of these types of metalworking, but this is a broad look at the average salary metalworkers can earn.
What’s the difference between metalworking and blacksmithing?
Blacksmithing is a category and industry under the umbrella of metalworking. Metalworking includes a wide number of methods, which include blacksmithing, along with welding, casting, jewelry making, and more. Blacksmithing utilizes a forge, hammer, and anvil to manipulate metal, primarily iron and steel. Early welding methods are rooted in blacksmithing techniques, dating back to 3000 BCE.
A foundry is a facility that creates cast metal objects. The first official foundry was called a Cannon Shop and was built in Moscow in 1479. The 14th and 15th century foundry industry in Europe was known for the production of bronze and iron bells, canons, and cannon balls.This guide will cover how foundries operate, what foundry workers do, and how you can get started working in a foundry.
What is a foundry?
A foundry is a metal casting facility that creates metal objects by melting down metal, pouring molten metal into a mold, and letting it cool to solidify. Foundries are equipped with equipment, machines, tools, protective gear, and devices that all make this metal casting process possible. Foundry workers operate this equipment with a vast understanding and knowledge of the tools and materials used.
What do foundries do?
Foundries specialize in metal casting to create both ornamental and functional objects made of metal. The casting process includes patternmaking, creating a mold, melting metal, pouring the metal into a mold, waiting for it to solidify, removing it from the mold, and cleaning and finishing the object. The final cast metal object is a positive of the mold that was poured into. Molds can be made of ceramic shell, silica sand, plaster, or metal. Foundries can make anything from door and cabinet hardware, skillets and waffle irons, and machine parts. They are especially useful for larger cast metal objects such as bronze sculptures and bells.

Ferrous vs. non-ferrous metal foundries
Some foundries work with ferrous materials, while others specialize in non-ferrous materials.
Ferrous metal is any metal that contains iron, while non-ferrous metals do not. Ferrous metallurgy is more common than non-ferrous and represents about 90% of metal production worldwide. Non-ferrous metals include aluminum, copper, lead, nickel, tin, titanium, zinc, and alloys of these materials, like brass (copper and zinc) and bronze (copper and tin). There are different advantages to using ferrous versus non-ferrous metals for a project.
Functionality is the deciding factor when choosing which type of metal you will cast. For example, aluminum is commonly used for automotive castings because it is lightweight, reducing its weight and improving efficiency. On the other hand, cast iron is used for cookware because it has an excellent ability to withstand high heat.
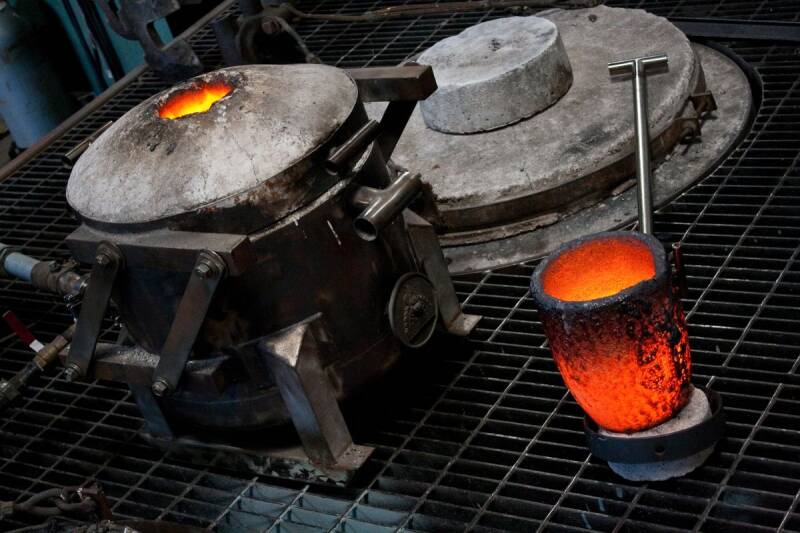
Metal casting in a foundry
Metal casting is a 7,000-year-old process used in both manufacturing and fine art. Molten metal is transferred from a crucible into a mold to create a positive metal cast object during metal casting. The metal and mold are cooled, and the metal object is removed and finished. You can create a sand mold or ceramic shell mold in a foundry. There are many different approaches to casting. Learn more about the different ways to cast metal in this metal casting guide.
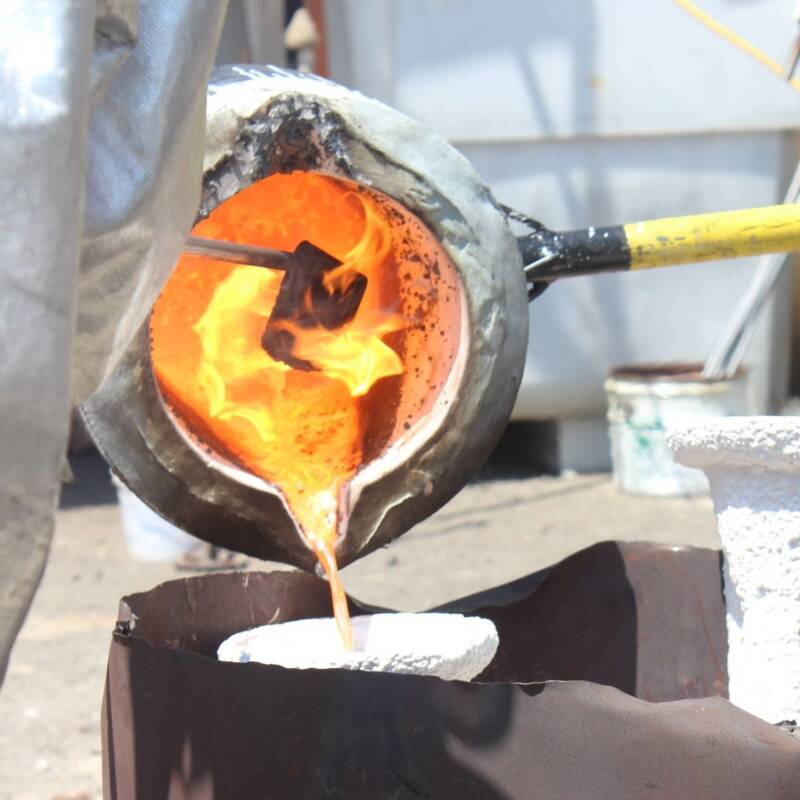
Foundry Crucible.
-
Purpose:
A container used in foundries to melt metals or other substances at high temperatures for casting.
-
Materials:Commonly made from graphite and clay to withstand the extreme heat required for melting.
-
Function:Its thick walls and heat-resistant properties allow it to be used in direct heat and open flame foundries to process large batches of material.
-
Examples:Used for melting precious and non-precious metals, such as aluminum.
HANG That Axe: 10 Essential Steps to Re-Handle your Axe Head.
Today in the shop I show you how to hang an axe head. Ill walk through the 10 essential steps that make it easier than you think to prep the handle and the head, and then shape and fit the handle to the head in a way that will ensure that it fits snug for as long as possible.
Tools You’ll Need
Here’s what you’ll need to hang an axe head like a pro:
-
Drill (for removing the old wedge)
-
Draw knife or farrier’s rasp (for shaping the handle)
-
Mallet (for setting the wedge)
-
Vise (with leather or padding to protect the handle)
-
Wooden wedge and steel wedges (for securing the head)
-
Sandpaper or a card scraper (for finishing touches)
Most of these tools are likely already in your shop, and if they’re not, they’re easy to find at your local farm store or online.
Choosing Your Handle
When picking a handle, the most important thing to look out for is the grain. You want to make sure it runs vertically from the handle to the head of the axe. The best material handle to use is typically Red Oak, Ash, or Hickory like our ‘Full Swing’ Axe Handle. Our handle is manufactured on a lathe to ensure consistency in shape and feel. It’s always best to avoid softer woofs like pine or fir.
Next choose a handle that feels most comfortable for your swing. Our ‘Full Swing’ Axe Handle offers a generous palm swell and a large eye that allows for shaping to fit oversized or irregular axe heads.
Step-by-Step: Hanging an Axe Head
1. Remove the Old Handle
Start by drilling out the old wooden wedge. Garrett recommends drilling down the center to remove the wedge material. Once the wedge is out, you can punch out the remaining handle using a homemade punch (Garrett’s is made from an old axe handle).
Pro Tip: If your axe head is loose but you love the handle, you can remove the wedge, refit the handle, and rehang it for a tight fit.
2. Shape the New Handle
Some axmen prefer to hand the axe after shaping their handle but before sharpening the head. Others prefer to sharpen the head before fitting it to the handle. Either works fine as long as you take the time to do the job properly.
Once you’re ready to shape, use a draw knife or farrier’s rasp to shape the new handle to fit the axe head. Remember, it’s important to take your time here:
-
Mark the eye: Trace the inside of the axe head onto the handle for a guide.
-
Remove material slowly: When working with wood, always make sure you're going slow because you can't put wood back on, so taking off small amounts is preferred.
-
Check for alignment: Look down the length of the handle to ensure it’s straight and even.
3. Fit the Axe Head
Proper fit is key here. Don’t rush through this step as an ill-fitting head could be potentially dangerous and cause injuries. A properly hung axe head must securely affix to the handle, be in line with the handle, and the angle of the head must align vertically with the handle.
Garret suggests looking down the length of the handle of the tight part of the eye to ensure you’re not shaving more on one side than the other. You want to have a nice straight line all the way down through the end of the handle to keep the axe head straight as it goes on.
So, as you go, you’ll need to test and fit as you go. As you’re fitting, try blending the area that you’ve removed handle material from so that you don’t have any abrupt or sharp edges. It’s a slow process, but the more time you take putting it together and taking it apart, the better your final product will be. Garrett, a Westcoast Saw lead product tester, recommends fitting and removing the head multiple times (at least 10!) to ensure a snug, secure fit.
Pro Tip: Use a Westcoast Saw depth gauge as a card scraper to smooth out rasp marks and leave a clean finish.
4. Set the Wedge
Once the head is fitted, cut a kerf (slot) about ⅔ the depth of the eye. Keep in mind that you don't want to cut your kerf too deep because then it’ll weaken the handle. Once you’ve got it shaped out where you want it, do a little fine tuning before hanging. This is when you can take a wooden wedge and cut it down to the length you need and then tap it in with a mallet. For extra security, add steel wedges to spread the wood and lock the head in place.
Pro Tip: Angle the steel wedges to avoid splitting the handle.
5. Finish and Preserve
Trim the excess wedge material and sand the handle for a smooth finish. To preserve the wood of your handle, Garrett recommends using Danish oil, Odie’s oil, or linseed oil. Regularly oiling the handle and wedge will keep them swollen and tight, preventing cracks and extending the life of your axe.
Get the Gear
Ready to hang your own axe head? Grab one of our Westcoast Saw handles—forged in the USA and built to last. Pair it with our depth gauge for a flawless finish, and don’t forget to stock up on Danish oil or linseed oil to keep your tools in top shape.
--------------------------------------------------------------------------------------------------------------------------------------------------------------------------------------------------------------
Blacksmithing is by no means a dead trade, but if you watch or have watched shows like Forged in Fire, you’ll notice the modern forge has quite a few degrees of separation from the bellows and hammering of forges past. When I first got into blacksmithing, I wanted things to be modern. “This trade won’t die if we just keep moving forward!” I’d think; but all the automatic power hammers in the world won’t make you a better craftsman, and if all your fires are perfectly electronically heated, what will you really know about the giants whose shoulders you’re standing on? This is a guide on what you’ll need to set up your very own forge – the right way.
Now, I’m not slamming those who use the modern tools, and I have nothing but respect for anyone else who chooses to take up the hammer, but I personally found that something was lost in the push for modernity, at least for blacksmithing. In my push to find what I was looking for – that feeling of being covered in soot and coal, hammering away like a madman, I started learning about the older and time-tested ways of doing things: I’ve never looked back since. The additional advantage of the “old school” way is that it’s favored by backyard artisans and those who have limited space and budgets. To put it simply, the forge you can put together in your backyard with the help of this article will be a lot cheaper than a professional fabrication shop.
The point I’m trying to get to here is that anybody can stick a blowtorch in a metal drum and bend some iron, but if you don’t do things the right way, it’s not going to be nearly as rewarding, nor are you going to get near as nice a product at the end of the day. We’ll be focusing today on setting up your own shop, what that means, what you’ll need, and why it’s important.There are many types of forges out there, but the main two are solid fuel and liquid fuel. We’ll be focusing on the former rather than the latter. Solid fuel includes any sort of coal, coke, and even sometimes wood, way back in the early Iron Age. Solid fuel has been used for literal ages as a tool for blacksmithing, and it isn’t going away any time soon, which is why it’s so important to focus on.
Without further ado, here’s what you’ll need to get hammering away for yourself.
Hammers and Long Handled Blacksmith Pliers:
It might seem absurd to say this, but obviously your average everyday carpenters hammer won’t work for bending white-hot metal. If you’re working with metal you’ll want a few heavy machinist hammers, and at least 1 Ball Peen or Flat Peen hammer. This will make life immeasurably easier when working with the anvil and leg vise. In addition to this, if you’re going to be doing any “forge welding” (a process described later) you’ll need a large, heavy, long-handled sledge hammer.
A Hardy Log:
Or a ‘tool log’, anyways. A log with some metal hooks attached to it that you can hang your hammers off of is a mainstay of any competent blacksmiths shop. You could go out and get yourself a fancy metal tool-rack, but it’s probably cheaper just to go into the woods and find an old chunk of wood. Logs are usually my first choice when it comes to equipment racks due to their surprising resistance to the heat of the forge.Bach Ritterburg Tool Pliers
Bach Ritterburg Tool Pliers Blacksmith
BlacksmithAnvil:
Anvils can be surprisingly inexpensive on places like craigslist or just general antiques shops. Worse comes to worst, you can ask any friends you’ve got that live on farms: most old estates used to have personal farriers, and so there’s probably a decent chance you’ll find a farriers anvil. Though there are many types of anvils out there, I’ve found that farrier’s anvils are set up the best way for bending metal. Rather than just giving you a flat surface, they give you a jutting horn with which you can bend your metal, and overall provide an easier platform for turning iron and steel into malleable putty. They also have strategically placed holes in them for the purposes of adding tools and attachments to your anvil should you choose.
In the German lithograph below, you can see what I mean with regards to the anvil. Alongside an anvil, you should invest in a good floor-mountable vise grip that can be quickly closed; this makes handling and bending metals easier. Trust me when I say, you do NOT want to touch nearly molten iron with your hands (I know this from experience).
A quick aside: Blacksmiths didn’t traditionally make horseshoes: that was, admittedly the job of the farrier who was far more specialized. If a blacksmith is like a general practitioner, a farrier is more akin to a specialist foot-surgeon. We blacksmiths did, however, really, really like their anvils, and lots of us stole their design.
The Forge Itself:
Your forge should be made of heat-resistant firebrick. The best place to get these is believe it or not at ceramics and hobbyist stores. Asking for bricks that go inside kilns is usually far cheaper than buying blacksmith-specific ones, with the same results. The Forge itself can look however you want, so long as it has a few general elements that it adheres to. There has to be an air source, which sends air through the tuyere and into the firepot. Your fire itself should be made of coking coal, which takes a little bit to heat up. Soft coal is typically the easiest to purchase for this purpose, and it gets far far hotter than its hard counterpart.
The additional advantage of this type of coal is that it turns, with heat, into coke, which is incredibly useful for starting your fires, and would be quite expensive unless you just made it yourself in your forge. The forge should also be very well ventilated, with a chimney for all of y,our fumes to escape. Coal dust, and especially the by-product of burnt coal, should likely not be inhaled at any great length, as it can lead to a host of nasty problems, which is what makes your ventilation so important to your forge in general.
Your air source doesn’t have to be a bellows, and there are plenty of electronic solutions in the modern world, but a hand-operated-blower is actually usually far better for keeping your fire going at the right temperature. As you learn to smith and work the forge, you’ll learn that air-flow is incredibly important, and if you aren’t so hot on spending hundreds of dollars a month on restocking your coal, you should just get a hand-operated blower, so that while you’re hammering away at your metal, your coal doesn’t keep burning at the same temperature needed to melt metal
A Partner:
Blacksmithing in teams of two is almost as old as the trade itself. Usually the teams of two would include one apprentice working the bellows, and one master smith actually heating and manipulating the metal. As forge welding became more popular, teams of two grew in popularity also, as a result of the fact that you need an incredibly heavy sledge hammer to slam down on the heated metal, while somebody holds the two pieces of metal together in the right position. Even if you’re not working with forge welding, having a partner is important for safety reasons, and just because it’s always fun to have someone to talk with while you’re hammering away.
Quenching Bucket:
This one is relatively self-explanatory. You don’t need an oil quench bucket or heat sink if you’re not forging high-grade steel, so if you’re just starting out, a simple wooden or metal bucket filled with water will work perfectly for quickly cooling down your crafts and forgings. The point here isn’t necessarily that you cool it particularly quickly or in any specific way, but rather that you get the danger of super-heated metal out of the way when you’re done with whatever you’re doing. Quickly hardening some small parts can also be important for making complex bends and hooks.
Important Extra Bits and Pieces Undeserving of their own Category:
• Anhydrous Borax: This is necessary for forge-welding
• Large Rasp/File: This is for filing down burs. Even if you don’t need it initially, you’ll need it as you progress.
• Forge tools: These are for moving and manipulating the coal. They can be little more than a long handled rake to move around the coal or a long piece of metal that you can use to shovel the coal into the firepot.
• Clinker Breaker: These are incredibly important and often unused in forges. Clinker Breakers are used to break up the little deposits of metal that will colelct in the bottom of your forge. They can be purchased online, and are essential to keeping your tuyere and firepot clean.
• Safety Equipment: For the love of goodness, please get yourself a decent blacksmithing apron. This will keep motel metal, sparks, and burning coals off your body, and trust me, you don’t want any of those things hitting anywhere vital!
--------------------------------------------------------------------------------------------------------------------------------------------------------------------------------------------------------------
Contact us
Have a question or want to book a workshop? Contact us today using the form below.
Create Your Own Website With Webador